Step By Step Guide To The Curly Girl Method

written by nail expert Jess Rowley
Topics we've covered
Step By Step Guide To The Curly Girl Method:
Do you suffer from frizzy, slightly curly, or even wavy hair and desperately looking for a way to tame your unruly locks? Well, this may be a result of your haircare routine.
Curly hair definitely doesn’t come with a handbook, so don’t worry.
Whether you’re using the wrong shampoo, over-washing your hair, using the wrong products that are killing your curls, I can guarantee that switching to the curly girl method will TRANSFORM your hair– trust me.
Chuck out your store-bought sulfate-filled shampoo sister and come along for the ride, girl; the right conditioner, gel, and method will do your curls the trick nicely.
But what is the curly girl method?
I’ll go into detail shortly into the wonders of the curly girl method, but for now, how ready are you to transform your entire routine for the luscious curls you’ve dreamed of??
You won’t want to miss this, I can assure you.
So What Is The Curly Girl Method?
So the Curly Girl Method was officially developed by the hairstylist and curl expert Lorraine Massey who wrote the official Curly Girl: The Handbook.
It is a guide to getting excellent curls using and avoiding certain products and styling techniques. It has also been modified over the years to suit a wider range of wavies, curlies, and coilies.
This guide will help you figure out the best cocktail of ingredients and application methods for your exact hair type, allowing you to boost your natural wave, curl, or coil.
It is also brilliant for taming frizz, reducing dryness, and preventing breakage.
Does The Curly Girl Method Work For All Curl Types?
Unfortunately, no, it doesn’t. It works wonders for curl types 2C to 4A, and those curl types seem to benefit most from the curly girl method.
That being said, type 2a and 2b-girls don’t tend to benefit from the curly girl method as their hair isn’t quite curly enough. The same goes for taming type 4B and 4C hair.
This doesn’t mean you can’t give it a go, though! The curly girl method is brilliant for rehydrating improving the health of your hair.

How To Start The Curly Girl Method The Basics
Since there is a very in-depth book about how exactly to do the curly girl method, it is probably best to go over the basics instead of confusing you with all the information.
FYI don’t worry. We will go over all this in detail shortly!
Step One: Final ‘Reset’ Wash:
Before you jump in with a whole new routine or washing your hair you’ll need to wash out all the bad stuff.
In this step, you’ll be washing your hair with your previous sulfate-filled shampoo to remove all the silicone and wax buildup on the strands of your hair.
Step Two: Cleanse:
Once you’ve done the first shampoo, make sure your second shampoo wash is done with a sulfate-free or co-wash shampoo.
Make sure you massage this into your scalp for at least 60 seconds before rinsing to get rid of any excess grime, dirt, sulfate buildup, etc…
Step Three: Condition Your Hair:
Scrunch a handful of conditioner through your hair until it feels slimy and saturated at the ends and then detangle the knots with your fingers or a wide tooth comb.
Rinse out most but not all of the conditioner.
Step Four: Style Your Hair:
Rake and scrunch a palmful of gel into your sopping wet hair from the root to tips– trust me, you may feel like you’re putting lots in but this is normal .
Step Five: Dry:
Once the gel is evenly distributed, scrunch the excess water from your hair with a cotton T-shirt and then either leave it to airdry or scrunch with a diffuser.
Once your hair is 100% dry, scrunch it with your hands to get rid of the crunch gel coating, and voila!
Step Six: Repeat:
Repeat steps 2-5 every time you get your hair wet, and only wash with your ‘reset’ shampoo if you accidentally use a product with silicones or wax.
After a few weeks, you’ll notice a transformation in your hair in the definition of your curls, reduction or frizz, and the healthy feel.
Seems pretty simple right? Well it is but there’s a few more steps to go through and things to avoid which brings me onto my next list.

Things To Avoid When Doing The Curly Girl Method:
In order for the curly girl method to work, there are a few things you should avoid:
– Shampoo WHAT??? Don’t panic. These are just traditional shampoos you should avoid, like the type full of sulfates that strip your hair like no tomorrow.
– Heat Tools: You probably saw this coming; try to resist the urge to pull out the flat iron and curling wand every time you go out with the girls and embrace those luscious curls!
Trust me, after this method, your friends will be jealous and die to have curls like yours. But don’t worry, the occasional straightening won’t hurt for an occasion.
– Sulfates: No more cheap hair products from Target or Walmart; our hair deserves better! These products are packed with sulfates which leads to staw-like hair.
Sulfates are like harsh detergents, and they’re mainly found in shampoos and some heat protectants; they badly damage and dry out your hair.
– Silicones: You may see silicones in 90% of conditioning and styling products which leave your hair looking silky and smooth, but this is only because they’re coating the ends of your hair in literal plastic.
Most silicones cannot be dissolved with water and will sit on your hair; they cannot be removed without sulfates which are a no-no in the Curly Girl Method.
Want to know more? I created a full guide of everything you need to know about silicones.
Silicones build up on your curls without sulfates, leaving them lank, dry, flat, and greasy, making them the number one enemy. You need to be sure your products are free of silicones.
– Waxes and mineral oils: These are just like silicones and require sulfates to remove them from your hair leading to more unnecessary buildup we don’t need.
– Towel Drying Your Hair: You may have seen me mention earlier to dry your hair with a cotton t-shirt and wondering why?
Well, using a towel roughs up your hair cuticle leading to frizz and tangles; most curly girls like to plop their hair or scrunch the water out with a cotton t-shirt or microfibre towel.
– Alcohols: Don’t worry, you can still drink alcohol; the alcohol, I mean, is ones found in aerosol sprays like canned hairspray and dry shampoo.
Alcohols are bad for the hair. They can degrade your hair’s cuticle and are almost always found in aerosol sprays. If you must use either one, opt for an alcohol-free version.
So What Shampoo Can You Use For The Curly Girl Method?
So now you know to avoid the majority of shampoos, you may be wondering what shampoo can you actually use then and why do a ‘reset’ shampoo before starting the CGM?
Well, for starters, the reset shampoo (sulfate-filled clarifying shampoo) is needed before starting the curly girl method for your hair to be immaculate and stripped of silicone and wax buildup.
I’ve created a full guide of the best clarifying shampoos for curly hair to use as your reset shampoo before completing the Curly Girl Method.
Sulfate-free shampoos won’t get rid of wax and silicones, so you need a blank slate to start with to get this method to work for you.
If you want to know more about what is clarifying shampoo, then I spoke about it in a full article so be sure to check it out for the dos and don’ts on curly hair.
After this one, the last shampoo, then no more traditional, sulfate shampoos for you– unless you accidentally use silicones or wax.
So what shampoos can you use after this one then?
Sulfate-free shampoo:
Sulfate-free shampoo is the only shampoo you can use in the Curly Girl Method. It is also known as “low-poo” shampoo, meaning that it is low in shampoo.
It contains gentle detergents which break down scalp oils and buildup without stripping the hair. It is best for thin waves and flat curls, which tend to get greasy fast.
Here’s a tip: some sulfate-free shampoos can still be a bit drying; if your hair feels almost squeaky, rather than the slipper, the cleaner is too harsh for your hair.
If this happens, you won’t need to throw it out, don’t worry. Instead, just mix with a couple of pumps of conditioner, which should help prevent this dryness.
Cleansing conditioners:
Cleansing conditioners are a curly girl’s best friend. Cleansing conditioners are also called “co-washes” or “no-poo” shampoo. They’re lightweight conditioners that can be used as shampoo without leaving your hair looking greasy.
Coily hair and most curl types won’t benefit from much detergent because their hair is naturally really dry anyway, they need water, moisture, and a scalp massage to do the trick.
To cleanse your scalp, you should massage the cleansing conditioner for at least 60 seconds for it to be immaculate and refreshed.
Most Curly Girl Method guides suggest you should start with a cleansing conditioner rather than a sulfate-free shampoo regardless of your curl type as your scalp adjusts more than you may think.
All The Curly Girl Method Approved Products You need:
To build a Curly Girl Method Routine, you’re going to need to get the right products.
However, it’s not as easy as listing what type of products you need; you need to make sure they’re curly girl approved by checking the ingredients.
But for most cases, if you see a product, you like it is pretty easy to type into Google whether that product is Curly Girl Method Approved.
Your Reset Shampoo:
The first thing you’ll need for even starting the Curly Girl Method is a clarifying shampoo full of sulfates. This shampoo is used to get all the silicones, waxes, all that grime out of your hair before you start the Curly Girl Method.
You should only use this shampoo once, so if you’re buying it especially for the curly girl method, either go for travel size or small size.
The only other time you’ll need this shampoo is if you accidentally use silicones, waxes, or anything that a sulfate-free or co-wash cannot get out of your hair.
Once you’ve used this shampoo once, then say goodbye to sulfates and even shampoo if you have dehydrated curls and decide to use a co-wash.
Hair Detangler:
Since you should only really be washing your hair once or twice a week, you should only detangle your curls when washing. It is always best to detangle before and after washing for minimal breakage and maximum curl definition.
But you should never detangle bone dry curls; you should apply a hair detangler for curly hair or hair oil to create some slip to ease the knots within the hair.
Work in sections and apply the detangler to each section and comb through using a wide-toothed comb or detangling brush, starting at the bottom and working your way up.
Be patient, the small the sections, the easier the detangling will be and the less breakage it will cause. No tugging or snagging your curls as this can damage the natural curl.
When following the Curly Girl Method, you should always avoid silicones, especially non-soluble silicones; this will cause buildup as they are broken down with sulfates (which are a no-no on the CGM).
Always detangle before and after you shampoo as shampooing knotted curls can make the knots worse and cause more breakage, so always try to detangle beforehand.
Sulfate-Free Shampoo Or Co-Wash:
Now, this is the stuff you’ll be using on the weekly or every other day of cleansing your hair. Sulfate-free shampoo or conditioning cleansers are approved by the Curly Girl Method.
But they have to be free of certain ingredients like:
- – Silicones
- – Sulfates (obviously)
- – Waxes
- – Mineral Oils
- – Parabens
- – Phthalates
Some of these ingredients can be really harmful to our curls as they weigh them down; you will usually find these ingredients in cheap drugstore products.
Silicones especially weigh down your curls because, without a sulfate shampoo to remove them, they just build up on your hair, leaving it looking lifeless, flat, and greasy.
Co-washes are brilliant for curly hair; they’re essentially lightweight conditioners that cleanse your hair without leaving a greasy residue.
Even some sulfate-free shampoos can still damage hair, so co-washes are ideal as they hydrate the hair strand without damaging it.
I would recommend if you find yourself washing your hair regularly, switching to washing your hair once or twice a week, and then doing co-washes in-between.
I would also recommend investing in a scalp massager, they’re not essential, but they’re brilliant for stimulating the scalp and promoting hair growth.
‘Squish To Condish’ your hair; once you’ve covered your head and massaged for at least 60 seconds, you should scrunch the ends of your hair; this ensures the conditioner is infused right into the cuticle.
Heat Protectant
Your heat protectant is the most important step of the Curly Girl Routine; it protects hair from extreme heat damage and helps to retain moisture within the hair.
The best heat protectants for curly hair come free from silicones; silicones tend to build up on the hair, and with sulfates to remove them, they leave curls looking greasy and limp.
So straight out of the shower, you should apply your heat protectant before your leave-in conditioner. Use a wide-tooth comb to evenly distribute the product.
You might want to get a hair oil for curly hair, too, as most hair oils are lightweight and often include a heat protectant within them. Hair oils are brilliant at hydration.
It creates a seal over the ends of your hair to help lock in moisture and provide a barrier between your hair and the heat tool you are using, including heat from your blow dryer.
Heat protectants also help to define curls and tame frizz by locking in moisture and sealing bonds on the end of your hair.
Curl Defining Gel:
The secret to flawless curls is to apply gel to sopping wet hair; wanna know why? Well, for starters, it helps to lock in moisture to the ends of your hair while also helping to tame frizz.
Any curl defining products are key to a good curl day, whether that is a curl defining gel or cream.
Adding moisture and retaining moisture in your hair is essential for taming frizz; if your hair is hydrated and nourished, it is less likely to be frizzy.
You should scrunch in a palmful of gel (this may seem way too much but trust the process) to the ends of your hair before plopping or diffusing your hair.
The best way to apply is to flip your head upside down and scrunch upwards; this will ensure the entirety of the ends of your hair are covered.
Don’t panic– this may leave a hard shell cast on your head when dry; this is normal! All you need to do is wait until your hair is dehydrated and then scrunch up again; this will get rid of this hard casing and leave you with flawless curls.
You can do this using a t-shirt or soft microfibre towel to get rid of that crunch.
Curl Cream Or Mousse:
You can also use a curl-defining cream or mousse to define your curls after co-washing your hair. This can be your leave-in conditioner or curling cream.
You should use a pea-sized amount for each application and make sure to rub the product thoroughly between your hands before applying.
Then gently cover each curl from root to tip, smoothing over and then scrunching each curl. Some Curly Girl Method followers also like using a curling cream with a Denman Brush and twist and twirling while brushing through the curl; this is brilliant at defining curls.
Some people also use curl-defining mousse instead of gel or even paired with gel; this gives curls that little extra bounce, but it can be drying.
Deep Condition:
Since curly hair is the most prone to dryness and frizz, it is super important that you maintain a good deep conditioning routine.
This stems back to years of stripping your curls with sulfates, excessive use of heat, flat irons, curlers, you name it.
Sometimes our hair needs that little push towards repair, I would recommend using a CGM-approved deep conditioning mask every 1 to 2 weeks, and you’ll notice a difference in your hair.
Curl Refreshers:
Curl refreshers often come in a spray, and they bring life back to your curls without needing to hop in the shower and restyle sopping wet hair.
Instead, they tend to come in a spray option, and you spray a little on the ends of your hair to revive your curls. These are brilliant for when you’re stuck for time.
Diffuser:
When drying your hair, there are two methods of maintaining luscious curls; you can either plop your hair or use a diffuser. I’ll go into how to plop your hair shortly.
Most blow dryers either come with a diffuser attachment or can have a diffuser attached; a diffuser is a cone-shaped attachment with ventilation holes and grippy bits to he;p maintain a natural curl pattern when drying your hair.
It helps speed up drying time and helps curls look defined and refreshed after use. You can use it by cupping your scalp and using it to cup the ends of your curls.
Use a scrunching like a method when diffusing your hair, using the attachment to catch and cup your curls., You should dry your curls no more than 90% with the diffuser to allow them to cool and dry fully before breaking the gel cast.
Microfibre Towel or Long Sleeve Cotton T-shirt:
Chuck out the ordinary towel and switch it up with either an oversized long-sleeved cotton tee or a microfibre towel.
Many people don’t realize, but the towel you use may be the root of your frizz problems, most towels cause friction which causes breakage and frizz.
In the Curly Girl Method, you should either use a cotton t-shirt or a microfiber towel to scrunch and dry your hair.
I personally prefer using a long-sleeve t-shirt when plopping my hair as it is much easier to tie around your head, and it leaves curls looking flawless.
This is all the kit you should need; as long as you keep an eye on the ingredients list, these products will work wonders for your hair.
It’s all about finding what works for you, some products may work for some curls but not others; check out my guide for my top recommendations of the best products for curly hair.
How To Plop Your Hair:
So you’ve mastered co-washing, applying all your products, and scrunching? Brilliant, the next task is plopping your hair; you can either diffuse your hair or plop it.
You may have heard of lots of curly girls “plopping their hair” and have no idea where to start, and don’t worry; I’m here to show you.
So there are a few ways you can plop your hair depending on the item you’re using, i.e., a T-shirt, microfibre towel, or a pillowcase. The easiest method is definitely the t-shirt, and it is my favorite as you get the best results.
Here’s how:
Step One: Grab a big T-shirt:
I would recommend grabbing yourself a men’s XXL tee with long sleeves; it was the easiest to use, especially if you have long, thick curls.
Lay your t-shirt upside down with the sleeves and the neck hole closest to you on a chair or bathroom counter.
Step Two: Wrap the hair:
Once you’ve applied your stylers, such as a lead-in conditioner or gel, to your sopping wet hair, flip your hair over the center of the t-shirt pressing your head down on the curls.
Reach up and grab the bottom of your shirt (with your head still upside down) and lay it over your head so it is touching the nape of your head and completely covering your hair.
Think of it as creating a protective bag over your curls.
Step Three: Grab the sleeves and tighten:
While still holding the edges of the shirt, grab the sleeves and twist them to tighten the t-shirt around your head. (See why I recommended using a long sleeve tee?)
Then wrap the twisted sleeves around your head and tie them in place to keep the shirt from sliding or falling off; if it looks like a wet helmet, then you’ve done it right.
I would reccomend wearing this for like 10-20 minutes, and then you’ll open the shirt to voluminous, frizz-free curls as the hair begins to dry– it’s pretty cool!
How Often Can You Shampoo Your Curls?
While as a general rule of thumb, most guides will tell you that you should only ‘shampoo’ or cleanse once a week; this all depends on the texture of your hair.
The main idea of cleansing your scalp once a week is to train your scalp to look less greasy, but it’s not as easy as bish bash bosh and just jumping straight to washing your hair once a week; it takes time to train your scalp.
Instead of “trying to train your scalp,” these guides should promote that as long as you’re using gentle, moisturizing products, it shouldn’t matter how often you cleanse.
If you have coiler hair, you should try co-washing once a week, but if you have thicker, coarser curls, then cleansing 1-3 times a week will do you good.
And if you have fine oil-prone waves, then you should wash them every other day.
How To Wash Your Hair With Conditioner:
Getting rid of your shampoo from your hair care routine requires adjustments to how you rinse and condition your hair, completed your reset shampoo? Great! Then you’re ready for the plunge, don’t worry. It may seem daunting at first, but you’ll be amazed by the results.
Fully drench your hair with water: Before you go in with the cleansing conditioner, you’ll need to soak until it is sopping wet; this should help loosen debris, making it easier to rinse out dirt and grime.
This should also help distribute the product evenly throughout the hair to prevent any greasy spots where you may have gone overboard with the conditioner or accidentally missed it.
Coat your hair with conditioner: Forget the BS about how you need a dime-size amount of conditioner; when using a cleansing conditioner, you need enough to cover the root of your hair to the tip.
For some people, if it can be as much as a golf-ball-size amount, don’t be shy with the conditioner as remember you’re not just conditioning your hair but also cleansing.
Massage, massage, and massage some more: You want to massage your scalp like no tomorrow to help evenly distribute the conditioner from the scalp to the ends. This should help break down any residue leftover from your styling products.
You should be massaging your scalp for at least 60 seconds to help stimulate the blood flow and remove all dirt and grime from your roots; you need to work it more than shampoo to notice the most benefits.
Once it has been evenly distributed and you have a spare few minutes, I would reccomend leaving it for 3 to 5 minutes (especially if your hair is particularly dry or damaged), and then it will act as a mask.
Then after those 5 minutes are up, I would reccomend giving the ends of your hair a little scrunch, then rinse, dry with a microfibre or cotton t-shirt, and apply styling products. The key is to scrunch styling, cream, gel, hair oil, etc., upside down to ensure the cuticles are absorbing the product.
Using clarifying shampoo once every 2-4 weeks: Buildup from sweat, stylers or conditioner is inevitable even when avoiding all the harsh chemicals; sometimes co-washing or shampooing your hair with sulfate-free shampoo is bound to happen.
Once or twice a month, you should clean your hair with a clarifying shampoo to cure your dullness without drying; if you’ve noticed your hair lacks volume or feels like it’s been weighed down, this is your sign that it needs it washing with clarifying shampoo.
Can You Use Olaplex Products In The CGM?
Yes absolutely!! But not all Olaplex products are strictly CGM friendly. The best Olaplex products for curly hair are No. 0 – 3 because they are free of silicones.
The rest of the Olaplex range contains water-soluble silicones which are not allowed on the strict CGM guide. That being said you can use them still for curly hair as they do not build up on the hair like soluble silicones.
They also help with moisture retention so all Olaplex products are curly hair friendly but the No. 0 to 3 are silicone-free so they are ideal for the strict method.
Despite not all products being under the CGM guidelines, Olaplex is extremely beneficial for curly hair, especially fragile and damaged curls.
Summary:
The Curly Girl Method has transformed so many girls curls from those who just think their curls are waves to turn out to be 3b curls.
Just upgrading your routine with the right products, the right care, and the right application, and your curls will look defined, frizz-free, and all-around beautiful.
It may take a few weeks to work but stick with it, and the results are definitely worth the wait, trust me. Having the right curly hair tools and products will go a long way.
Healthy, hydrated curls have never been so easy.
Best L’Oreal Products For Men
[Review] in 2022 written by nail expert Jess RowleyCheck out the results fast - here are our review winners[dica_divi_carousel item_width_tablet="400px" item_width_phone="345px"...

Best Neutrogena Skincare Products
[Review] in 2022 written by nail expert Jess RowleyCheck out the results fast - here are our review winners[dica_divi_carousel item_width_tablet="400px" item_width_phone="345px"...
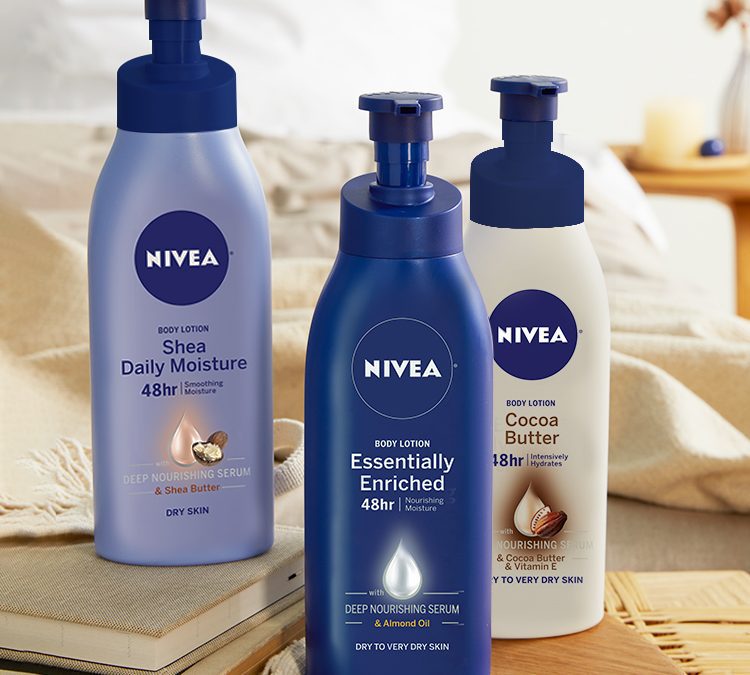
Best Nivea Products For Men
[Review] in 2022 written by nail expert Jess RowleyCheck out the results fast - here are our review winners[dica_divi_carousel item_width_tablet="400px" item_width_phone="345px"...
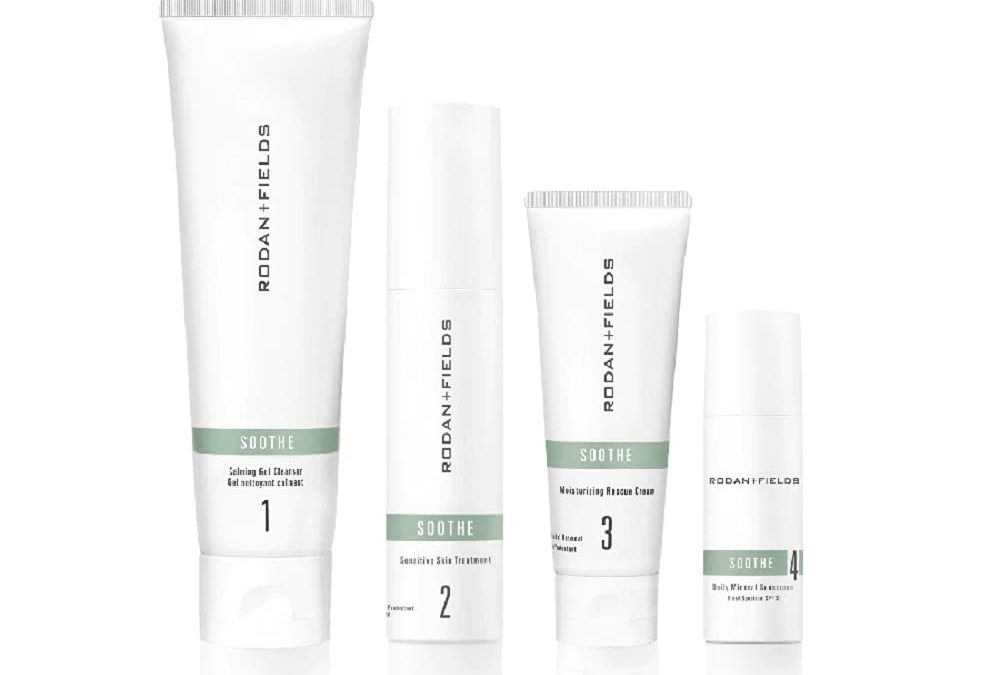
Best Rodan+ Fields Products
[Review] in 2022 written by nail expert Jess RowleyCheck out the results fast - here are our review winners[dica_divi_carousel item_width_tablet="400px" item_width_phone="345px"...
Related Post: Best Products For Curly Hair